Anatomy of a Dental Implant: A Step-by-Step Guide to Restoring Your Smile
Published 27 min read
A dental implant is one of the most complete solutions available for replacing a missing tooth. Unlike a simple filling or a removable denture, an implant is a full system made up of three key parts: a titanium post that goes into your jawbone, an abutment that connects everything together, and a crown that sits on top and looks just like a real tooth. Each component plays a specific role, and together they work as a team to restore your smile from the root up. This guide will walk you through every part of that system and every stage of the process so you can feel genuinely informed before stepping into any dental office.
Whether you are seriously considering dental implants, already scheduled for surgery, or simply curious about how the whole thing works, this article is written for you. By the time you finish reading, you will understand the anatomy of an implant, how the procedure unfolds step by step, what healing looks like, what risks to watch for, how much it typically costs, and how to take care of your implant for the long haul. Think of this as your complete roadmap to one of modern dentistry's most effective treatments.
Understanding What a Dental Implant Is
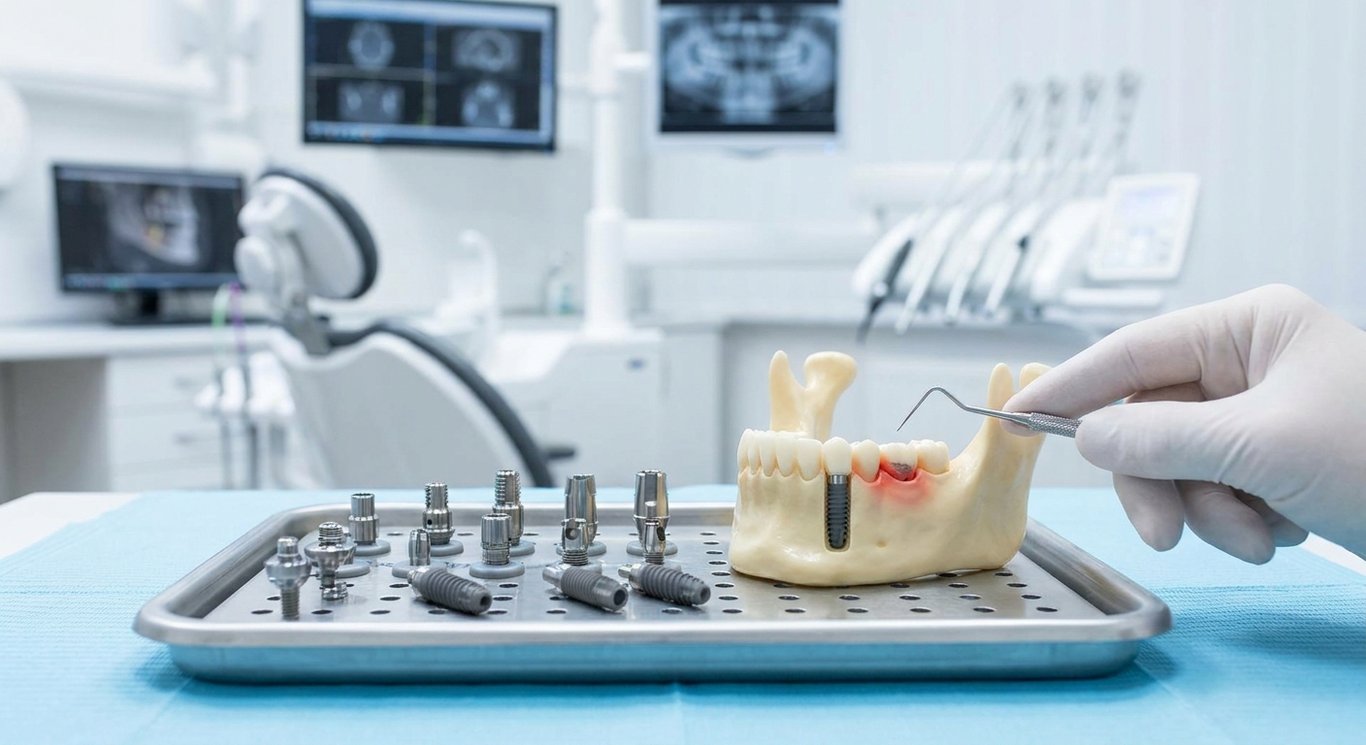
At its core, a dental implant is a surgically placed replacement for a missing tooth. It consists of three distinct parts working together: a small metal post, usually made of titanium, that is inserted directly into the jawbone to act as an artificial root; an abutment, which is a connector piece that links the post to the visible part of the tooth; and a crown, the custom-made cap that looks and functions like a natural tooth. Together, these components create a restoration that closely mimics the structure and feel of what nature originally provided.
Compared to other tooth-replacement options, implants stand out in several important ways. Dental bridges, for example, require the dentist to grind down the healthy teeth on either side of the gap in order to anchor the restoration. Dentures, while removable and more affordable upfront, can slip, click, and sometimes cause discomfort because they rest on the gum surface rather than being anchored to the bone. Implants, by contrast, are fixed in place, preserve the jawbone by stimulating it the way a natural root would, and look so natural that most people cannot tell the difference. That combination of stability, bone preservation, and appearance is a big part of why implants have become the gold standard for tooth replacement.
There are also a few common misconceptions worth clearing up right away. Many people assume dental implants are purely cosmetic, like a whitening treatment or veneers. In reality, they serve critical functional purposes. Implants restore chewing efficiency, which directly affects nutrition and digestion. They also help maintain proper speech, since missing teeth can cause slurring or whistling sounds. On top of that, they preserve the structure of your face — when a tooth root is lost, the jawbone in that area can shrink over time, which can lead to a sunken appearance. So while a beautiful smile is certainly a welcome result, the benefits of implants go much deeper than looks.
Core Anatomy: The Three Main Parts of a Dental Implant
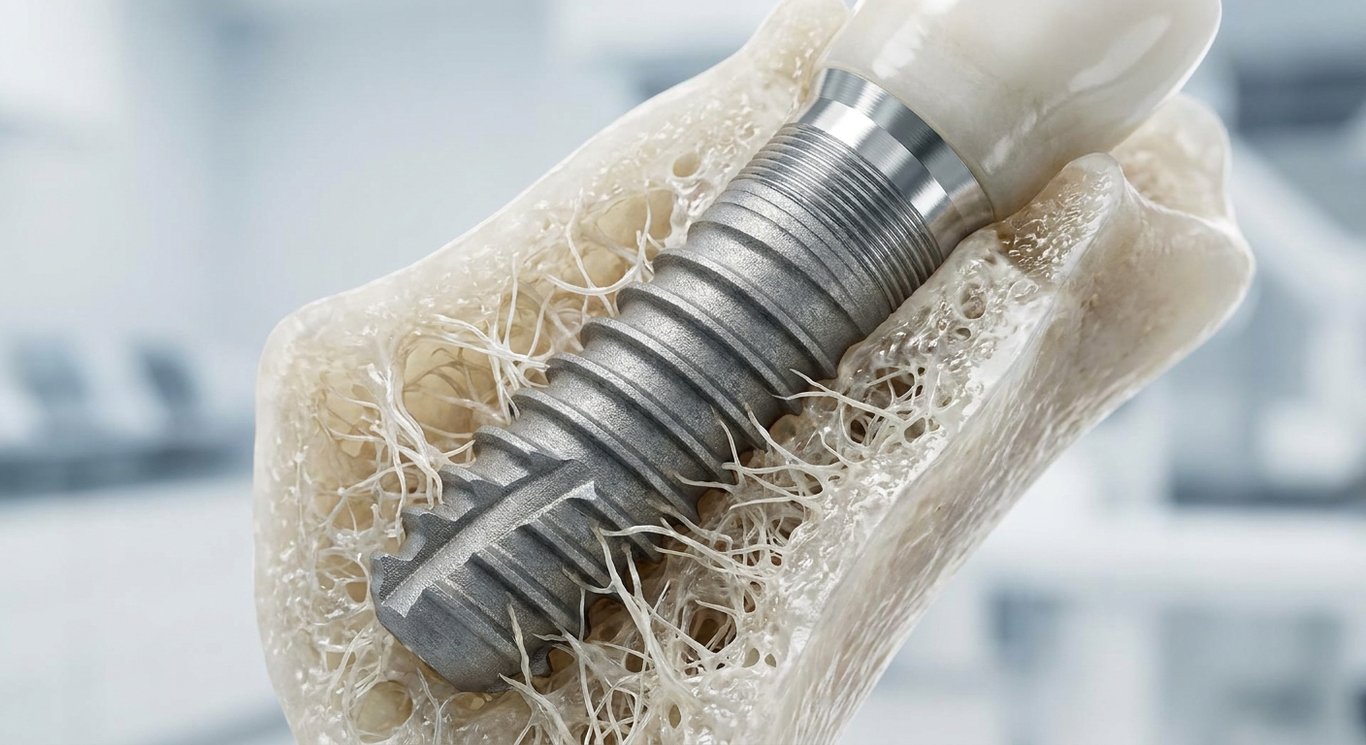
The implant fixture, often called the implant post, is the foundation of the entire restoration. It is a small, screw-shaped cylinder typically made from titanium, a metal that the human body tolerates extremely well. This post is surgically placed into the jawbone where the missing tooth's root used to be. Over the weeks and months following surgery, the bone tissue gradually grows onto and around the surface of the post in a process called osseointegration. Once that bond is established, the implant becomes a stable, permanent anchor that can support a tooth restoration just like a natural root supports a natural tooth.
Sitting on top of the implant post is the abutment, which acts as the critical connector between the buried post and the visible crown above the gum line. After the implant has fused with the bone, the abutment is attached to the top of the post and protrudes slightly through the gum tissue. Think of it as the neck of the implant — it creates a stable platform for the crown to attach to while also helping to shape the gum tissue around the restoration for a natural appearance. Abutments can be made from titanium, zirconia, or other materials depending on the specific case and the patient's needs.
The crown is the part of the implant that everyone actually sees. It is a custom-made, tooth-colored restoration crafted to match the shape, size, and shade of the surrounding natural teeth. A skilled dental laboratory uses impressions or digital scans of your mouth to design a crown that fits seamlessly into your smile. The crown attaches to the abutment and takes on all the daily work of biting and chewing. Because it is designed specifically for your mouth, it should feel comfortable and look completely natural from day one.
Beyond the basic three-part structure, there are meaningful variations in how implant components are designed and chosen. Crowns can be either screw-retained, meaning they are fastened directly to the abutment with a small screw, or cement-retained, meaning they are bonded onto the abutment with dental cement. Materials also vary — porcelain-fused-to-metal crowns offer strength with a natural look, while all-ceramic or zirconia crowns provide excellent aesthetics and are often preferred for front teeth. The choice of components depends on factors like the tooth's location in the mouth, the forces placed on it during chewing, and the patient's cosmetic priorities. Your dentist will weigh all of these factors when building your personalized treatment plan.
Step 1: Consultation, Assessment, and Treatment Planning
The implant journey begins long before any surgery takes place. During your initial consultation, your dentist or oral surgeon will review your full medical and dental history, including any medications you take, existing health conditions, and previous dental work. They will perform a thorough oral examination to evaluate your gum health, check for signs of infection or decay, and assess the overall condition of your remaining teeth. This is also the time to discuss your goals — what you hope to achieve functionally and aesthetically — so the treatment can be tailored to your specific situation.
Diagnostic imaging is a critical part of this planning stage. Standard X-rays give a two-dimensional view of the teeth and bone, but many practices now use cone beam computed tomography, commonly called CBCT or 3D scanning, to get a far more detailed picture. These scans reveal the exact height, width, and density of the available bone, as well as the precise locations of nerves and sinuses that must be avoided during surgery. This level of detail allows the dentist to plan implant placement with remarkable accuracy, reducing risk and improving outcomes before a single incision is made.
Once the assessment is complete, your dentist will build a personalized treatment plan that outlines every step of the process from start to finish. This plan may include tooth extractions, bone grafting procedures, the number of implants needed, and a realistic timeline for each phase. It will also include a detailed cost estimate so there are no surprises along the way. This planning stage might feel like a lot of preparation for a procedure that hasn't even started yet, but it is arguably the most important part of the entire process — thorough planning is one of the strongest predictors of long-term implant success.
Step 2: Tooth Extraction and Bone Grafting (When Needed)
Before an implant can be placed, any damaged, decayed, or failing tooth that still occupies the space must be removed. Leaving behind an infected or structurally compromised tooth would create a contaminated environment that could compromise the implant from the start. The extraction is typically straightforward, though more complex cases — such as a broken tooth with curved roots — may require a more involved surgical removal. In some cases, the implant can be placed at the same time as the extraction, a technique known as immediate placement, though this depends on the condition of the surrounding bone and tissue.
Bone grafting becomes necessary when there is not enough healthy jawbone to securely anchor the implant post. This can happen when a tooth has been missing for a long time and the bone has gradually shrunk, or when an extraction left behind a significant defect. During a bone graft, the dentist adds bone material — which may come from the patient's own body, a donor source, or a synthetic substitute — to build up the area and create a stable foundation for the implant. Healing after a bone graft typically takes anywhere from three to nine months before the site is ready for implant surgery.
If you are feeling anxious about extraction or grafting, it helps to know what to expect. Both procedures are performed with local anesthesia, and sedation options are available for patients who want extra comfort. After the procedure, some soreness, swelling, and minor bleeding are completely normal and usually manageable with over-the-counter pain relievers and cold compresses. Your dentist will schedule follow-up visits to monitor healing and confirm that the bone is developing as expected before moving on to the next stage. Most patients find this phase much more manageable than they anticipated.
Step 3: Implant Placement Surgery – How the Post Is Inserted
Implant placement surgery is typically performed as an outpatient procedure, meaning you go home the same day. It is usually done under local anesthesia, which numbs the area completely, though oral sedation or IV sedation can be added for patients who feel nervous or need multiple implants placed at once. The basic steps involve making a small incision in the gum tissue to expose the jawbone, then using a series of precisely sized drills to create a channel in the bone that matches the diameter and depth of the implant post. The entire process is carefully guided by the treatment plan developed during the assessment phase.
Once the channel is prepared, the titanium implant post is gently threaded or tapped into place. The surgeon checks its angle and stability carefully, because proper positioning is essential for the crown to align correctly with the surrounding teeth. After confirming that the implant is seated correctly, the gum tissue is sutured closed over or around the implant. In some cases, a small healing cap is left visible above the gum line; in others, the implant is fully covered by gum tissue and will be exposed in a later procedure.
For a single implant, the surgical portion of the procedure typically takes between one and two hours. Multiple implants naturally take longer. Immediately after surgery, the anesthesia will still be in effect, so the area will feel numb for a few hours. Once it wears off, some tenderness, swelling, and mild bruising are expected — most patients manage these symptoms well with prescribed or over-the-counter pain medication and ice packs. You will be advised to rest, avoid strenuous activity for a few days, and stick to soft foods while the surgical site begins to heal.
Depending on your specific case, your dentist may place a temporary crown or a healing cap on the implant the same day as surgery. This is called immediate loading, and it is an option when the bone quality is strong enough to support it. In other cases, a delayed loading approach is used, where the implant is left undisturbed for several months to allow full osseointegration before any restoration is attached. If you had a front tooth removed, a temporary removable partial denture may be provided so you are never without a tooth in a visible area during the healing period.
Step 4: Healing and Osseointegration – How Bone Bonds to the Implant
Osseointegration is the biological process that makes dental implants so uniquely effective. After the titanium post is placed in the jawbone, the surrounding bone tissue begins to grow onto and into the textured surface of the implant. Over time, the bone essentially fuses with the metal, creating a bond that is remarkably strong and stable. This is not a simple surface attachment — the implant becomes genuinely integrated with your skeletal structure, which is why it can withstand the forces of chewing just as a natural tooth root does.
The timeline for osseointegration varies from person to person, but it generally takes somewhere between two and six months. Several factors influence how quickly and successfully this process occurs. Patients with dense, healthy bone tend to heal faster. Smoking significantly impairs blood flow to the bone and can slow or even prevent proper integration. Uncontrolled diabetes, certain medications like bisphosphonates, and a history of radiation therapy to the jaw can also affect healing. If bone grafting was performed before implant placement, the overall timeline will be longer since the grafted bone also needs time to mature and consolidate.
During this healing period, your role as a patient is just as important as the surgeon's work. Follow-up appointments allow your dentist to monitor progress and catch any early signs of trouble. You will be asked to eat soft foods, avoid putting direct pressure on the implant site, and maintain gentle but thorough oral hygiene around the area. Watch for warning signs like persistent or worsening pain, unusual swelling, a bad taste, or any movement of the implant — these could indicate infection or failed integration and should prompt an immediate call to your dental office. Fortunately, most patients move through this phase without significant complications.
Step 5: Abutment Placement – Connecting the Post to Your Future Crown
Once osseointegration is confirmed, the next step is placing the abutment. If the implant was fully covered by gum tissue after the initial surgery, a minor second procedure is needed to expose the top of the implant. The dentist makes a small incision in the gum, uncovers the implant, and attaches the abutment to the top of the post. In many cases, a healing cap — a temporary piece shaped like a small cylinder or dome — is placed over the abutment to guide the gum tissue as it heals and to create a natural contour around the future crown.
The good news is that this second procedure is considerably simpler and more comfortable than the original implant surgery. It is done under local anesthesia, takes only a short time, and involves minimal disruption to the surrounding tissue. Most patients experience only mild soreness for a day or two afterward. The gum tissue typically needs about two weeks to heal and shape itself around the abutment before the next step can begin. This short wait is well worth it, as properly shaped gum tissue contributes significantly to the natural appearance of the final restoration.
Once the gum tissue has settled and the abutment is stable, your dentist will take impressions or digital scans of your mouth. These records capture the exact position of the abutment, the shape of the surrounding teeth, and the way your upper and lower teeth come together when you bite. This information is sent to a dental laboratory where skilled technicians use it to design and fabricate your custom crown. Modern digital scanning technology has made this process faster and more precise than traditional putty impressions, and some practices can even use in-office milling machines to create the crown on the same day.
Step 6: Crown Fabrication and Final Restoration – Completing Your New Smile
Crown fabrication is where artistry meets technology. Using the impressions or digital files from your appointment, dental laboratory technicians design a crown that is built to match the shape, size, and color of your natural teeth. Depending on the material chosen — porcelain, zirconia, or porcelain-fused-to-metal — the crown is either hand-layered, milled from a solid block using computer-guided equipment, or a combination of both. The goal is a restoration that blends seamlessly into your smile so that even you might forget which tooth is the implant.
When the crown is ready, you will come in for a final placement appointment. The dentist will seat the crown on the abutment and check how it fits, how it looks, and how it meets the opposing teeth when you bite down. Minor adjustments to the shape or bite are common at this stage and are made chairside before the crown is permanently secured. Depending on the design of your restoration, the crown will either be screwed directly into the implant through a small access hole that is then sealed, or it will be cemented onto the abutment with dental adhesive. Either way, once it is in, it is meant to stay.
Most patients notice an immediate improvement in both function and confidence once the crown is placed. Chewing feels more natural, there is no gap to worry about, and smiling becomes something you do without thinking twice. That said, it can take a few days or even a couple of weeks to fully adjust to biting and speaking with the new tooth. If anything feels off — like the bite is uneven or there is persistent pressure — let your dentist know promptly so they can make a quick adjustment. Small tweaks early on prevent bigger issues down the road.
Benefits of Dental Implants for Function, Health, and Aesthetics
From a functional standpoint, dental implants deliver results that other tooth-replacement options simply cannot match. Because the implant post is anchored in the bone, the crown on top is completely stable — there is no rocking, slipping, or clicking the way removable dentures can behave. This stability allows you to chew a full range of foods with confidence, which has a real impact on nutrition and overall quality of life. Implants also support clearer speech, since a missing tooth or an ill-fitting denture can interfere with the way certain sounds are formed.
Beyond what you can feel and taste, implants are doing important work beneath the surface. When a natural tooth root is present, it transmits bite forces into the jawbone, which stimulates the bone to stay dense and healthy. When that root is gone and nothing replaces it, the bone in that area gradually resorbs, or shrinks away. An implant post replicates that stimulation, helping to preserve bone volume over time. This also means that neighboring teeth are less likely to drift into the gap, which can happen when a missing tooth is left unreplaced and can lead to bite problems and additional tooth loss down the line.
On the aesthetic side, a well-made implant crown is virtually indistinguishable from a natural tooth. The color, shape, and translucency can be matched so precisely that most people — including the patient — cannot tell it apart from the surrounding teeth. This has a meaningful effect on confidence. Many patients report that they stop covering their mouth when they laugh, feel more comfortable in social situations, and simply feel better about themselves after completing implant treatment. When you combine that emotional benefit with the functional and health advantages, it becomes clear why implants are often considered a worthwhile long-term investment.
Risks, Complications, and Success Rates of Dental Implants
Like any surgical procedure, dental implants carry some risk, and it is important to go in with a realistic picture. The most common concerns include infection at the implant site, damage to nearby nerves that can cause temporary or, rarely, lasting numbness, and sinus complications when implants are placed in the upper jaw near the sinus cavities. There is also the possibility that osseointegration does not occur as expected, meaning the implant fails to bond with the bone and must be removed. That said, serious complications are relatively uncommon when treatment is properly planned and performed by an experienced provider.
Several factors can increase the risk of implant failure or slow healing. Smoking is one of the most significant — it reduces blood flow to the gums and bone, impairing the body's ability to heal and integrate the implant. Uncontrolled diabetes affects immune function and wound healing in ways that can compromise outcomes. Poor oral hygiene, heavy clenching or grinding of the teeth (a condition called bruxism), and skipping follow-up appointments all raise the risk of complications. The overall success rate for dental implants is generally high — many studies report rates above 95% over ten years — but achieving those outcomes requires the patient's active participation in their own care.
Knowing what to watch for after surgery is just as important as knowing the risks going in. Some discomfort, swelling, and minor bleeding in the first few days are normal and expected. What is not normal is pain that gets worse instead of better after the first week, significant swelling that spreads, a bad taste or smell that persists, visible movement of the implant, or a crown that suddenly feels loose or different. Any of these signs should prompt a prompt call to your dentist. Catching a problem early — whether it is an infection or early implant mobility — gives the best chance of resolving it before it becomes a more serious issue.
Costs, Insurance, and Long-Term Maintenance
The cost of dental implant treatment is not a single flat fee — it is the sum of several components, each with its own price tag. These typically include the initial consultation and imaging, the implant surgery itself, any bone grafting that may be needed, the abutment, the crown, and follow-up visits throughout the process. Costs vary widely depending on the complexity of the case, the materials used, the geographic location of the practice, and the experience level of the provider. A single implant in a straightforward case will cost significantly less than a full-mouth reconstruction involving multiple implants, grafts, and extensive restorations.
Insurance coverage for implants has historically been limited, with many plans categorizing them as cosmetic rather than medically necessary. However, coverage is evolving, and some plans now offer partial reimbursement for certain components like the crown or the extraction. It is worth calling your insurance provider directly to understand exactly what is and is not covered before committing to treatment. Many dental practices also offer in-house financing plans or work with third-party financing companies that allow patients to spread the cost over monthly payments. Viewing implants as a long-term investment in your health — rather than a one-time expense — can help put the cost in perspective, especially when you consider that a well-maintained implant can last decades.
Long-term maintenance is a key part of protecting that investment. While the implant post itself is highly durable and rarely needs replacement, the crown on top is subject to normal wear and may eventually need to be replaced after many years of use — typically somewhere in the range of ten to twenty-five years, depending on the material and how well the patient cares for it. Routine dental checkups every six months, professional cleanings, and consistent home hygiene are all essential to keeping the implant and surrounding tissues healthy. The better you maintain the implant, the longer it will serve you well — and the more cost-effective it becomes over time.
Daily Care and Follow-Up: Keeping Your Implant Healthy for Life
Taking care of a dental implant day to day is not dramatically different from caring for natural teeth, but there are a few important details to keep in mind. You should brush at least twice daily using a soft-bristled toothbrush, which is gentle enough to clean around the implant without irritating the gum tissue. Use a non-abrasive toothpaste, since highly abrasive formulas can scratch the surface of the crown or the abutment over time. Pay extra attention to the gum line around the implant, as plaque accumulation in that area can lead to a condition called peri-implantitis — essentially gum disease around the implant — which is one of the leading causes of late implant failure.
Flossing around an implant requires a slightly different technique than flossing between natural teeth. Standard floss works, but implant-specific floss — which has a stiffer threader end and a spongy middle section — makes it easier to clean around the abutment and under the crown. The goal is to use a "C-shape" or "shoe-shine" motion, wrapping the floss around the base of the crown and gently sliding it back and forth to remove plaque from all sides. A water flosser is another excellent option, as the pulsating stream of water can flush debris from areas that are difficult to reach with traditional floss. Using both tools together gives the most thorough clean.
Professional maintenance is equally important. Your dental hygienist and dentist should examine your implant at every routine checkup — typically every six months — to assess the health of the surrounding gum tissue, check the stability of the crown and abutment, and take periodic X-rays to monitor the bone level around the implant. Make sure your hygienist uses instruments that are safe for implant surfaces, such as plastic or titanium-tipped scalers, since metal instruments designed for natural teeth can scratch the implant components and create rough surfaces where bacteria can accumulate more easily.
Finally, lifestyle choices play a real role in how long your implant lasts. Tobacco use — whether smoking or chewing — is one of the most damaging habits for implant health, increasing the risk of infection and bone loss significantly. Avoiding very hard foods like ice, hard candies, and certain nuts reduces the risk of cracking or chipping the crown. If you are a grinder or clencher, ask your dentist about a custom night guard, which protects the implant from excessive forces while you sleep. And whenever something feels off — unusual pressure, sensitivity, or any movement — report it to your dentist right away rather than waiting for your next scheduled visit. Proactive care is always easier and less costly than reactive treatment.
Frequently Asked Questions About the Anatomy and Process of Dental Implants
How long does the full dental implant process usually take from start to finish? The honest answer is that it depends on your individual situation, but most patients should plan for a process that spans several months to about a year. A straightforward single implant in a patient with good bone and no need for grafting might be completed in as little as three to six months. If bone grafting is required, that adds healing time, potentially pushing the total timeline to nine months or more. Multiple implants or more complex full-arch cases take even longer. While the waiting can feel frustrating, the staged approach exists for good reason — rushing osseointegration or skipping healing time increases the risk of failure.
Is dental implant surgery painful, and what is recovery like? Most patients are pleasantly surprised by how manageable the experience is. The surgery itself is performed under local anesthesia, so you should feel pressure and movement but not pain during the procedure. Sedation options are available if you want to be more relaxed or drowsy. After the anesthesia wears off, it is normal to experience soreness, swelling, and possibly some bruising for the first few days. Over-the-counter pain relievers like ibuprofen or acetaminophen are usually sufficient to keep discomfort under control, though prescription medication may be provided in more complex cases. If pain intensifies after the first few days rather than gradually improving, that is a signal to call your dentist.
How long do dental implants last, and will I ever need to replace them? The titanium implant post, once fully integrated with the bone, is designed to be a permanent fixture and can potentially last a lifetime with proper care. The crown, however, is a different story — it is exposed to daily wear from chewing, grinding, and normal use, and may eventually need to be replaced after ten to twenty-five or more years. The abutment is generally durable as well but can occasionally need adjustment or replacement. The longevity of every component is heavily influenced by oral hygiene habits, lifestyle factors like smoking, and the regularity of professional dental care. Patients who take excellent care of their implants consistently report the best long-term outcomes.
Am I a good candidate for dental implants? The ideal candidate for dental implants is an adult with one or more missing teeth, sufficient jawbone volume and density to support the implant post, healthy gum tissue free of active periodontal disease, and good overall health. Certain conditions — such as uncontrolled diabetes, autoimmune disorders, or a history of radiation therapy to the head and neck — may complicate treatment but do not necessarily rule it out. Teenagers are generally not candidates until their jawbones have finished developing. Smokers can still receive implants but face higher risks and are strongly encouraged to quit. The best way to determine candidacy is through a thorough consultation with a dentist or oral surgeon who can evaluate your specific anatomy, health history, and goals.
What are the main parts of a dental implant, and what does each part do? To put it simply: the implant post is the anchor, the abutment is the connector, and the crown is the tooth. The post — a small titanium screw — is placed in the jawbone and fuses with it over time to create a stable root-like foundation. The abutment is attached to the top of the post once healing is complete; it sticks up through the gum and serves as the attachment point for the crown. The crown is the custom-made, tooth-colored cap that you actually see and use for chewing — it is shaped and shaded to blend naturally with your surrounding teeth. Each part is essential, and the system only works as well as all three components together.
Conclusion: Key Takeaways and Next Steps in Restoring Your Smile
By now, you have a thorough understanding of how a dental implant is structured and how the entire process unfolds from the very first consultation all the way to placing the final crown. The three-part anatomy — post, abutment, and crown — forms a system that replicates the function and appearance of a natural tooth more closely than any other option available today. The staged process, which includes assessment and imaging, possible extraction and bone grafting, implant surgery, osseointegration, abutment placement, and crown delivery, is carefully designed to give each phase the time it needs to succeed. And as you have seen, good planning at the start and consistent care at home are two of the most powerful factors in determining long-term outcomes. Use the "Anatomy of a Dental Implant: A Step-by-Step Guide to Restoring Your Smile" as your starting point for a conversation with your dentist or oral surgeon — bring your questions, review your options, and take the step of scheduling a consultation if you have been on the fence.
Dental implants can genuinely transform the way you eat, speak, and feel about your smile — but only when they are placed by a qualified, experienced team and maintained with the care they deserve. The bone preservation benefits, the stability, the natural appearance, and the long-term durability all add up to a solution that many patients describe as life-changing. Now that you have the knowledge from "Anatomy of a Dental Implant: A Step-by-Step Guide to Restoring Your Smile," you are in a much stronger position to make an informed decision. Write down your questions, revisit the FAQ section whenever something comes up, and take those proactive steps toward finding out whether implants are the right path for you. Your smile is worth it.